

You start with a fabric with a pattern that you love. The fabric that I used had a great island print with hibiscus flowers on it. Roughly cut out your pieces. The fine detail cutting will come later. When you have your pieces cut you will then need to iron them.
 |
| Freshly ironed pattern. |
I had several pieces so I strategically placed them on a piece of Heat and Bond paper, placing them close together so as not to waste any paper. This paper is available by the roll and is very easy to use. Once I had my pieces in place I ironed only the middle of the pattern in order make it stick. This means that cutting around the flower will be much, much easier.
 |
| Be careful with the ironing! I stickied up the iron quite a bit before I perfected this little technique. |
Now that the flower is in place I cut the excess bond paper off.
 |
| Almost an applique. |
Once the excess is removed, place the (dry, no steam) iron onto the pattern for 8 seconds. Don't move the iron back and forth, this will make the pattern slip from the paper.
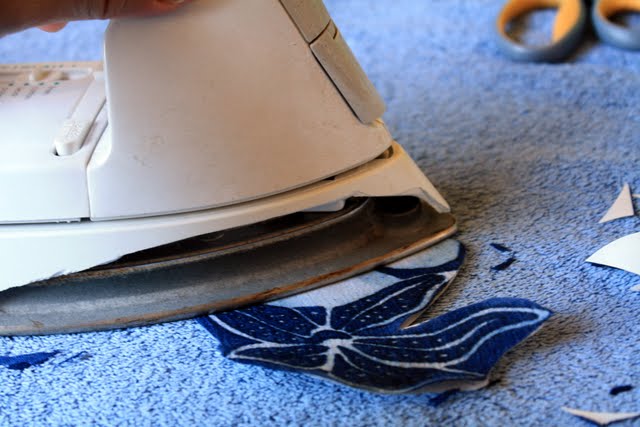 |
| Heating the pattern onto the paper. |
After ironing, the applique will be very hot. I use my scissors to pick it up to move it out of the way.
 |
| Hot, hot, hot! |
After the appliques cool down then you are ready to do your detail trimming. Then comes the most fun part! Find something that needs an iron-on applique, peel the paper backing and put the applique into place. Place a dry, hot iron onto the applique for 2 seconds, again not moving the iron. Voila, you are done!
 |
| Island print onesie. |
 |
| Bootie flower! |
At this point you can leave it like it is or you can embroider some detail onto it or give some other fun finishing detail.

1 comment:
Super tutorial! I have not tried this before but with these directions, I think I will give it a go! Thanks for this helpful post!
Post a Comment